


Add Devices Off-site with AMP Standardized Configuration
Overview
Use AMP to prepare new Encoders and Decoders at the office before adding them to an established Standardized Configuration system. The off-site workflow configures the new devices using assignments from the destination system's documentation. Install the configured devices in their assigned switchports when you arrive at the jobsite.
This procedure covers Omega Series, Ultra Series, and MaxColor Series systems. If you are working at the jobsite and can access the established system, use Add Devices On-site with AMP Standardized Configuration to retrieve its current information directly.
Expansion ports must already exist: The destination switch must have unused ports configured for the required Encoders or Decoders. An empty Data Network port does not qualify. Off-site configuration prepares the devices; it does not change the destination switch configuration.
Video Walkthrough
Before You Begin
- Download and install Advanced Matrix Programmer (AMP).
- Confirm that the new models are compatible with the destination system's series, features, and firmware.
- Obtain a current system report or other verified documentation showing the Device Network subnet, firmware versions, and available input, switch, and port assignments.
- Have a PC with a wired Ethernet adapter, Ethernet patch cables, and a switch that can connect the PC and new devices on the same local network.
- Provide suitable PoE or each device's supported power supply.
A supported Standardized Configuration switch is not required for the temporary office connection. A suitable unmanaged switch can connect the PC and devices for preparation. The managed switch at the destination remains responsible for the established system's Encoder and Decoder port assignments.
Use Gather Details in AMP at the jobsite to obtain an updated system report before off-site preparation when the existing documentation is incomplete or outdated.
Check the Destination Assignments
Identify a confirmed unused assignment for every new device. Do not assume that a missing model or firmware entry in an old report proves that its port is still available.
| Device | Values entered in AMP | Final connection to record |
|---|---|---|
| Encoder | Just Add Power Subnet and Input # | The switch and physical Encoder port associated with that input in the report. |
| Decoder | Just Add Power Subnet, Switch #, and Port # | The exact switch and physical Decoder port selected in AMP. |
Input # is not the physical switchport number. For example, a report may assign Encoder input 7 to Switch 1, Port 17. Enter 7 for Input #, then install the Encoder on Port 17. For a Decoder assigned to Switch 1, Port 10, select 1 for Switch # and 10 for Port #.
For details about these assignments, see Switch Configuration Guidelines for AMP Standardized Systems.
If suitable expansion ports are unavailable: The switch configuration must be rebuilt with additional Encoder or Decoder ports. Build New overwrites the existing switch configuration. Plan the change and service interruption before proceeding; do not manually modify standardized port or VLAN settings to create expansion ports.
Connect the Office Equipment
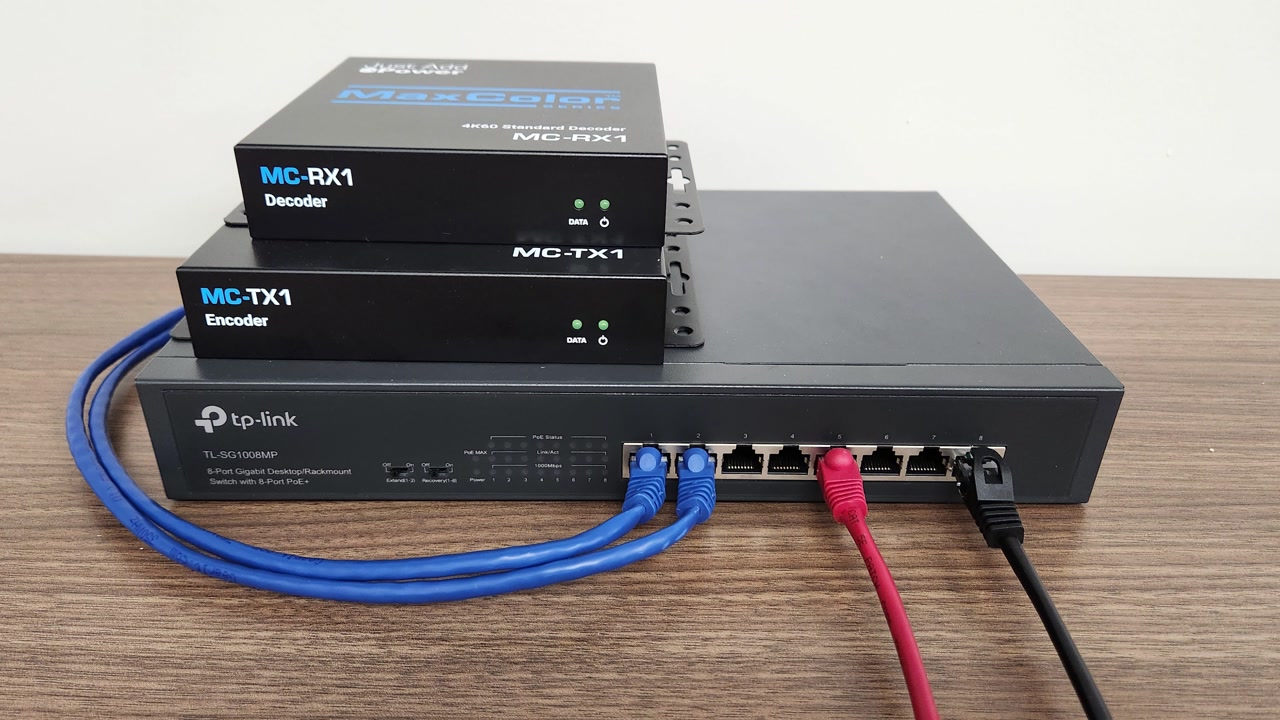
- Connect the PC's wired Ethernet adapter to the temporary office switch.
- Connect the new Encoders and Decoders to the same switch and local network.
- Provide power and allow the devices to complete startup.
If using a switch already configured for a Standardized Configuration system, use its Data Network ports for preparation. AMP will not discover the new devices through that switch's Encoder or Decoder ports.
Start the Off-Site Workflow
-
Open AMP and select Build & Expand for Standardized Configuration.

-
Select Add Devices.

-
Select Off-Site.

- Select the wired Network Adapter connected to the office switch, then click Go.
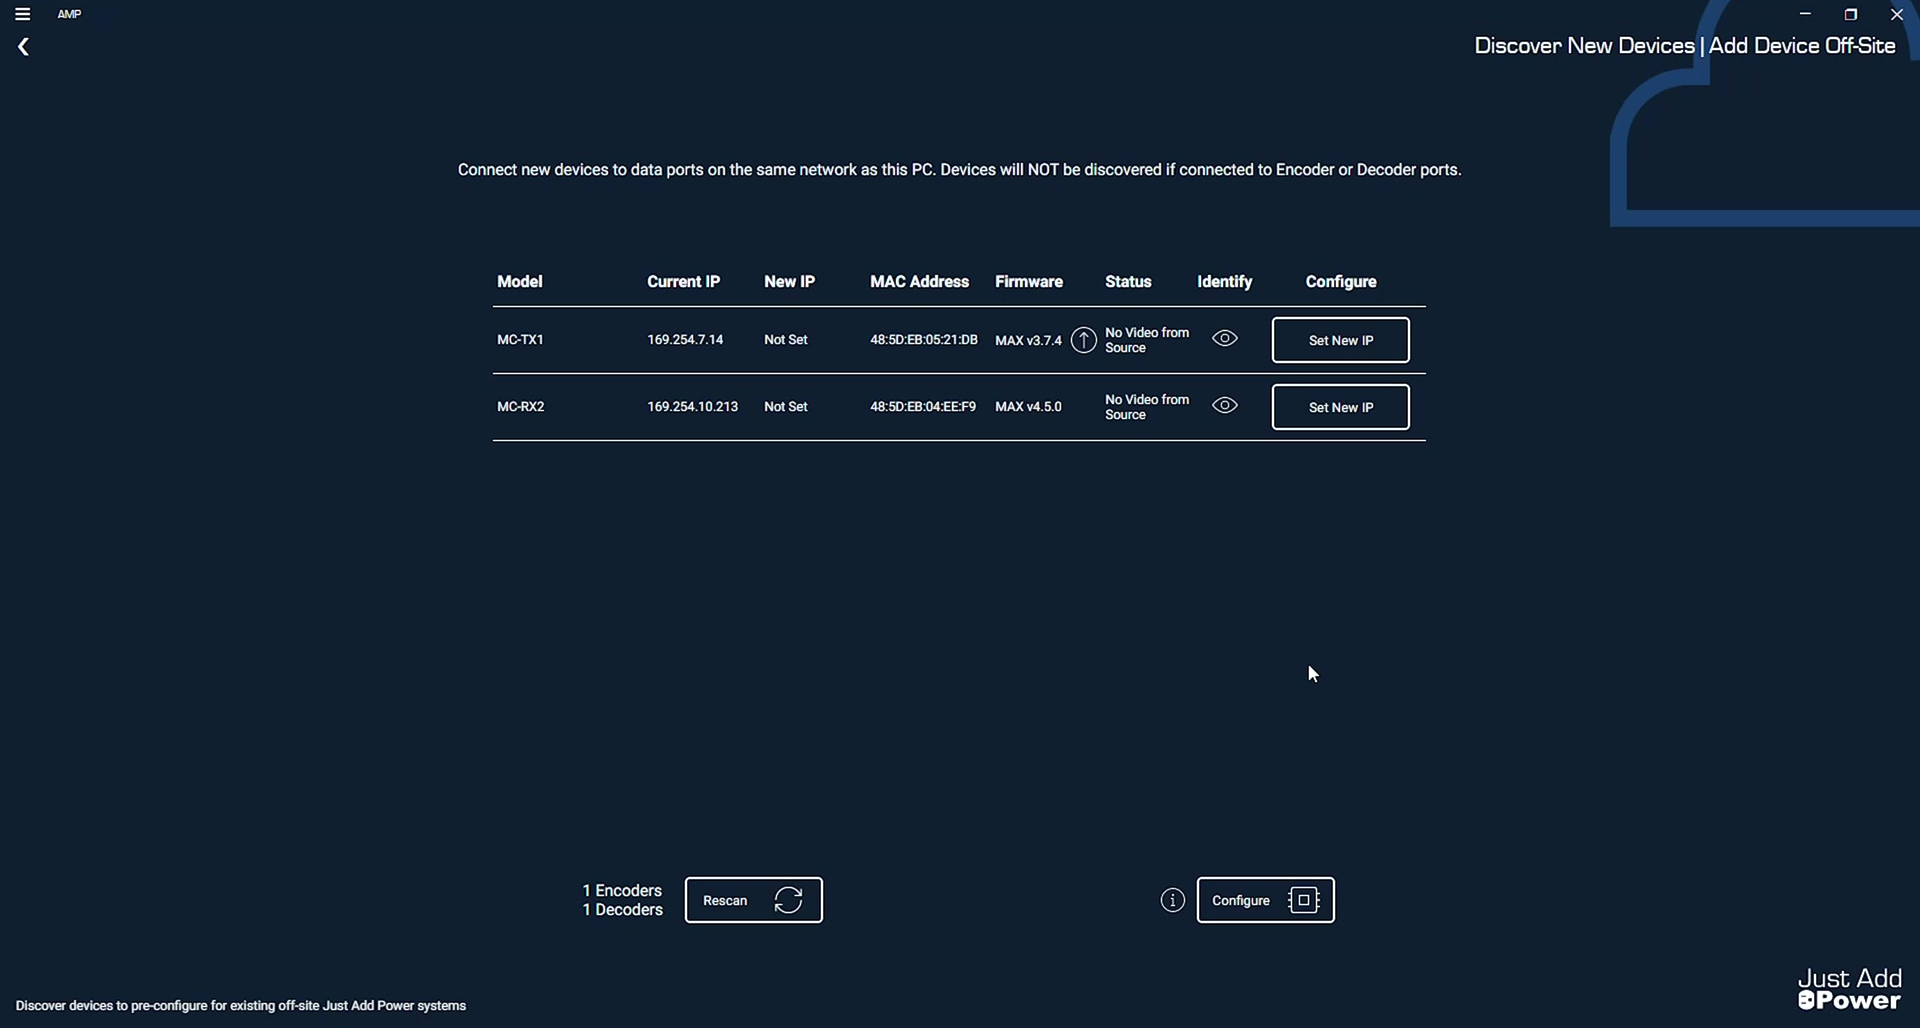
- Wait for AMP to discover the new devices. Check their models and MAC addresses against the devices you intend to configure.
Check Firmware Compatibility
Compare each discovered device's Firmware value with the destination system's documentation before assigning its new IP address. Off-site discovery cannot check the firmware of devices at the jobsite.
When AMP displays an upward-arrow firmware update control beside a device:
- Click the update control.
- Review the target version in the Firmware Update dialog and confirm that it is appropriate for the destination system.
- Click Start Update.
- Wait for the update and restart to complete, then check the reported firmware again.
Do not interrupt a firmware update. Maintain device power and network connections, and keep AMP open until the update completes.
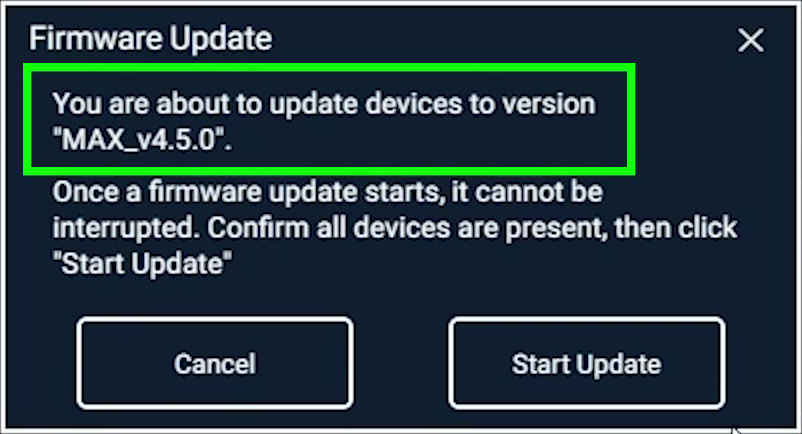
If AMP's offered version differs from the documented system firmware and compatibility is uncertain, resolve the difference with Just Add Power Technical Support before deployment. Do not assume that selecting a new IP address also makes the firmware compatible.
Assign the Device Settings
Encoder
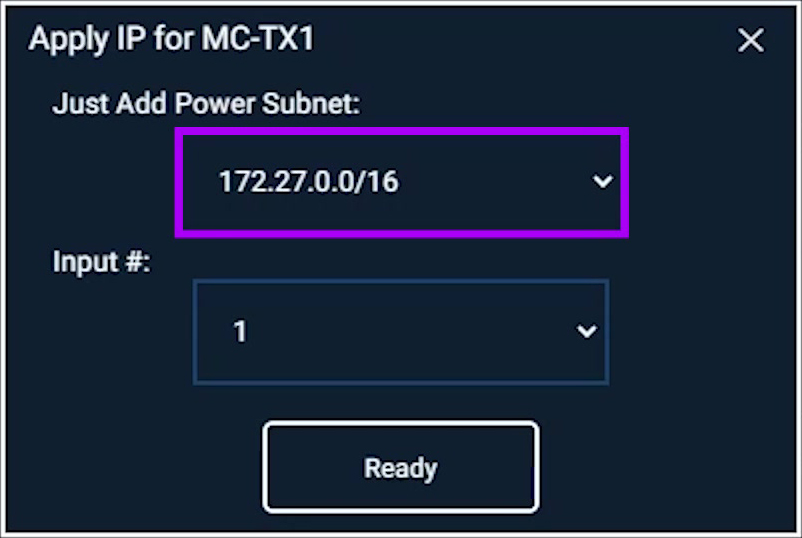
- Click Set New IP beside the Encoder.
- Set Just Add Power Subnet to the destination system's Device Network subnet.
- Set Input # to the confirmed unused Encoder input number from the report.
- Click Ready.
Decoder
- Click Set New IP beside the Decoder.
- Set Just Add Power Subnet to the destination system's Device Network subnet.
- Set Switch # and Port # to the confirmed unused Decoder connection from the report.
- Click Ready.
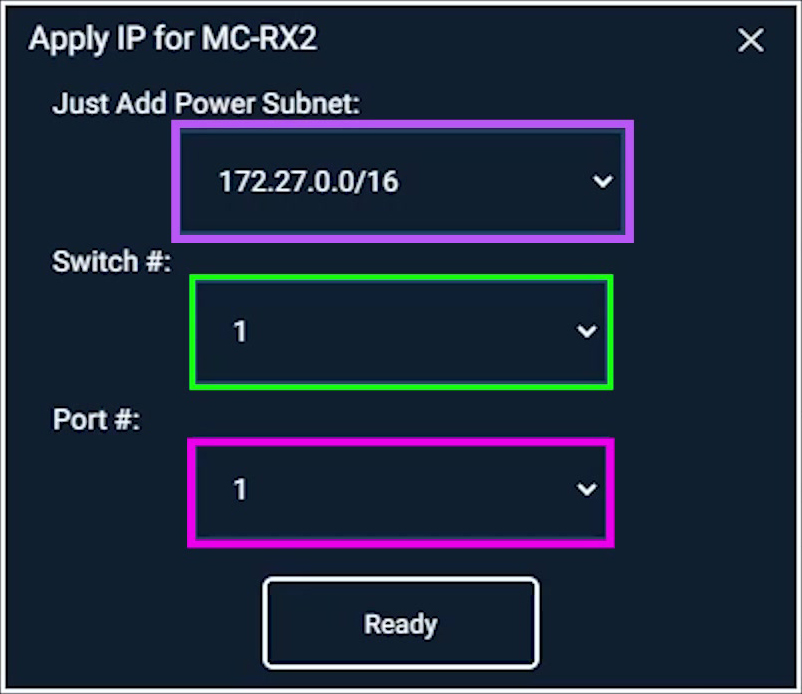
Repeat for every new device. Selecting Ready stages the assignment. Review the New IP column against the report before applying the configuration.
Use the destination system's values. The subnet and numbers shown in the screenshots are examples. Reusing an occupied assignment can cause an IP address conflict when the device is installed.
Apply the Configuration
- Confirm that every intended device shows the correct New IP and is marked Ready.
- Click Configure.
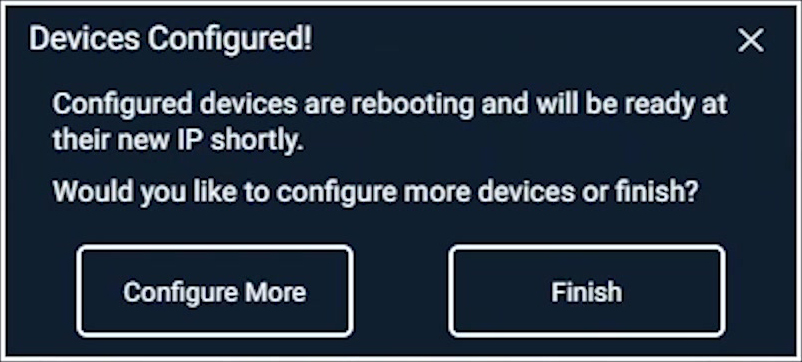
- Wait for Devices Configured!. AMP reports that the devices are rebooting and will be ready at their new IP addresses shortly.
- Select Configure More to prepare another group, or Finish when preparation is complete.
- Allow the devices to complete their restart before disconnecting power for transport.
Label each device with its assigned input or output, IP address, destination switch, and physical port. Keep those assignments with the job documentation.
Install and Verify at the Jobsite
- Confirm that the documented expansion ports are still available.
- Connect each prepared device to its recorded switch and physical Encoder or Decoder port.
- Connect the required sources, displays, and any additional audio, USB, or control connections.
- Allow the devices to start, then test each new Encoder with a compatible, known-working Decoder and each new Decoder with a compatible, known-working Encoder.
- Verify video, audio, and any additional features required by the installation.
- Update the control system with the new inputs, outputs, and IP addresses where required. Test switching from the customer's control interface.
- Save an updated Gather Details report with the site documentation.
Troubleshooting
A New Device Is Not Discovered
- Check device power and allow startup to complete.
- Confirm that the PC and new devices share the same local network and that AMP uses the correct wired adapter.
- On an existing Standardized Configuration switch, confirm that the temporary connection uses a Data Network port.
- Check the Ethernet connections, then click Rescan.
A Prepared Device Does Not Work at the Jobsite
- Compare its physical switchport connection with the report and device label.
- Check the configured subnet and assignment. For Encoders, distinguish the input number from the physical port number.
- Confirm that the assignment is not already occupied by another device.
- Verify firmware compatibility with the established system.
- If individual testing works but control-system switching does not, check the control programming for the new assignments.
For continued problems, follow Troubleshoot a Just Add Power System.

