Jan 04, 2022
Overview
Use the Windows Telnet Client for text communication to a switch or Just Add Power device.

If your computer does not yet have the Windows Telnet Client enabled, you will get a warning message when attempting to launch Telnet from the Windows Command Prompt that says 'telnet' is not recognized as an internal or external command, operable program or batch file.

How to Enable
Enabling Telnet only needs to be done one time.
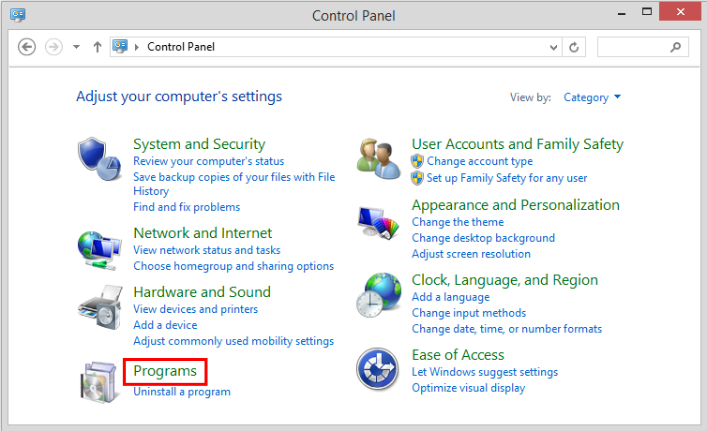
- Open Control Panel, then select Programs
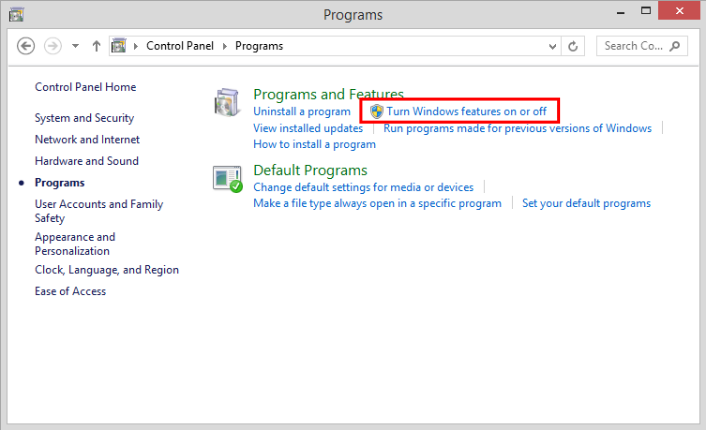
- Select Turn Windows features on or off
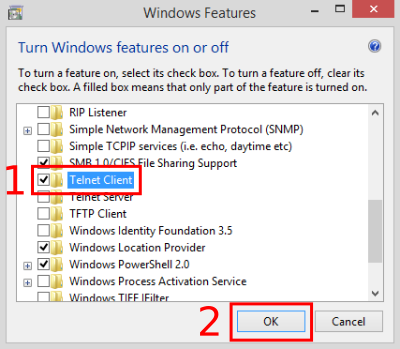
- Scroll down to Telnet Client, check the box, then select OK
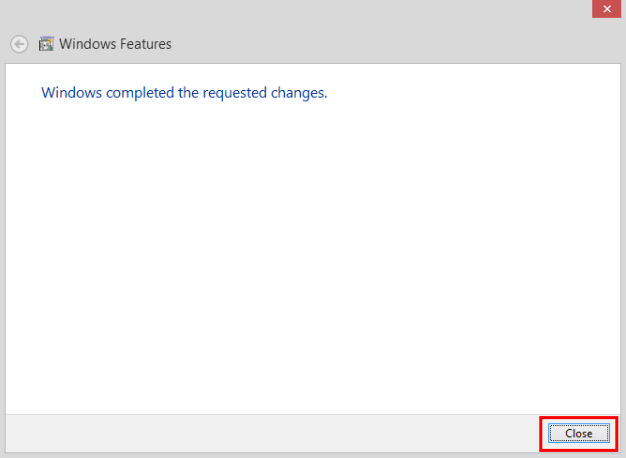
- Windows will enable the Telnet Client. Select Close once completed.
How to Use
- Open a Windows Command Prompt, type
telnetthen press [Enter]
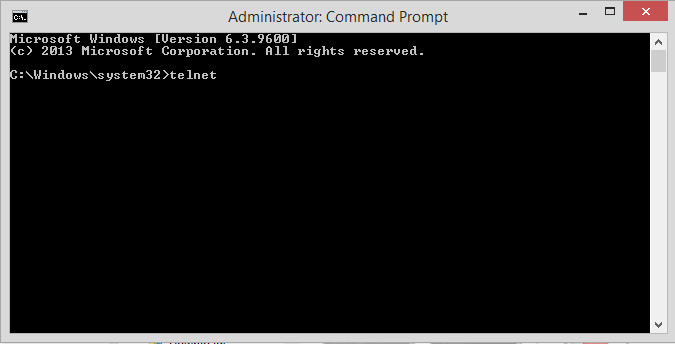
- In the new Telnet window, type the letter
ofollowed by the IP address of the target device, then press [Enter]


